Activity
Shamrock Pin

Don't let your kid get caught without green clothing or accessories on St. Patrick's Day! In just a few steps, he can craft a gleaming green shamrock pin for himself or a friend. Beading this small, festive pin is a great way to practice perseverance as he gets into the St. Paddy's Day spirit.
Related learning resources

Shamrock Earrings
Activity
Shamrock Earrings
Let these cute shamrock earrings bring the luck of the Irish to your fifth grader's ears!
5th Grade
Activity
Leprechaun Hat Pin Cushion
Activity
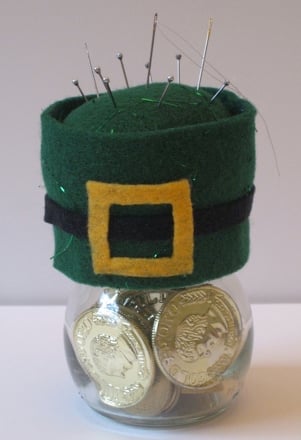
Leprechaun Hat Pin Cushion
...This structure will form the pin cushion.
Glue the pincushion to the top of the jar lid using a hot glue gun.
Now for the hat!...
5th Grade
Activity
Recycled Jeans
Activity
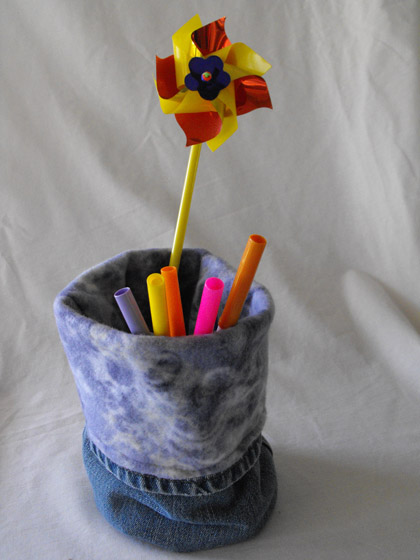
Recycled Jeans
...Pin the lining along the edge opposite the fold.
Sew a 5/8 inch seam along the pinned line.
Slip your lining into the jean leg. Pin in place....
5th Grade
Math
Activity