Activity
Passover Book

Felt activity book are great for keeping smaller kids entertained. They're especially fun to make around holidays—when themes for books abound, and Mom and Dad are busy with preparations. Another benefit to making your own busy book is that you can focus on learning areas appropriate for your child. This guide to making a busy book focuses on Passover as an example, but you can choose any theme or holiday, and get creative while designing the pages.
Related learning resources
Passover Coloring Page
Worksheet
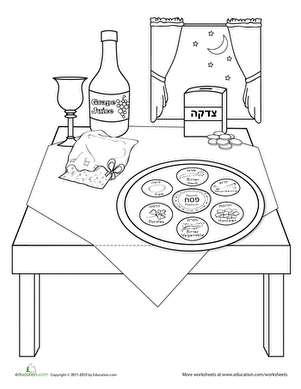
Passover Coloring Page
Help your child learn about the traditional Passover meal with this page that shows all the ceremonial foods.
kindergarten
Worksheet

The Story of Passover
Worksheet
The Story of Passover
Read all about the story of passover with this coloring sheet, and color in the pharaoh when you are finished!
preschool
Worksheet
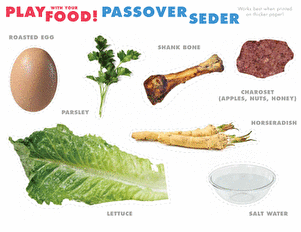
Passover Seder
Worksheet
Passover Seder
...play food, passover, seder, holiday, spring...
preschool
Arts & crafts
Worksheet