Science project
Mapping the Energy Use of My Classroom
Difficulty of Project
Easy to Medium
Cost (Approximate Cost of completing the project)
Less than $10
Safety Issues
None
Material Availability
Common
Approximate Time Required to Complete the Project
Less than four hours.
Objective
- To enhance the understanding and awareness of energy use
- To explore the concept of energy efficient
Materials
- Graph paper
- Pencil
- Colored pencils, crayons, or markers
Introduction
Each day we are surrounded with and use many fantastic technologies. While not always obvious, these technologies require energy to operate. This energy use can add up in terms of monthly power bills as well as the natural resources required to produce that power off site. Numerous energy efficient tools exist today to help us conserve resources and reduce our monthly payments. This experiments helps you identify what is using energy in our classroom and encourages you to brainstorm strategies for your school to reduce its consumption and monthly fees.
Research Questions
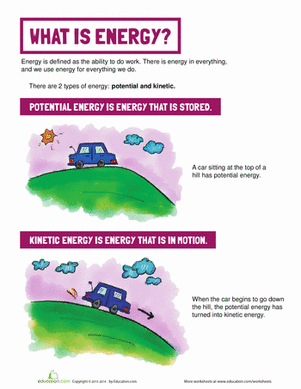
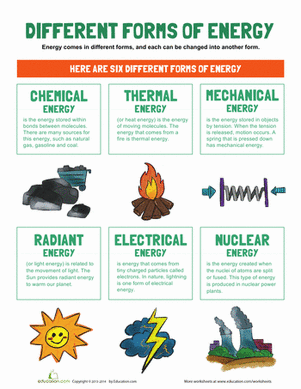
- What is energy? Does your classroom use much energy during the day?
- What items need energy or power in your classroom?
- After finishing your energy drawing, or energy audit, did you find more or less items than you expected?
- Do you notice any energy efficient devices or features in your classroom?
- If your school wanted to save money on their monthly electricity bills, what could they do?
Research Terms
- Energy/power
- Energy audit
- Conservation
- CFL lightbulbs
- Motion-sensors
- Energy efficient
- EnergySTAR
- Natural resource
Experimental Procedure
- Select a classroom in your school to use for this experiment.
- Using the graph paper and pencil, draw the walls of your classroom. Mark where any doors or windows are located.
- Pick one wall to start. Walk back and forth along that wall to identify anywhere an electrical outlet is located. Mark these on your drawing with color #1.
- Select a second color to mark anywhere there is a power cord plugged into the wall.
- Repeat steps 3 and 4 on all remaining walls until you have made a circle around your classroom and are back to where you began. Use color #1 and color #2 to show outlets and power cords on all walls for consistency.
- Select a third color pencil, crayon, or marker. Walk around the room and identify any objects that need energy but are not plugged in to a wall. They may be plugged in to a floor, battery operated, or not plugged in at the moment. Mark these on your drawing.
- Either turn your sheet of graph paper over or select a new sheet. Draw the walls of your classroom but this time label the drawing ‘Ceiling’.
- Examine the entire ceiling and identify any objects that require energy to operate (including lights and overhead projectors). Mark these on your graph paper.
- Sit back and examine your drawings.
Bibliography
Education.com provides the Science Fair Project Ideas for informational purposes only. Education.com does not make any guarantee or representation regarding the Science Fair Project Ideas and is not responsible or liable for any loss or damage, directly or indirectly, caused by your use of such information. By accessing the Science Fair Project Ideas, you waive and renounce any claims against Education.com that arise thereof. In addition, your access to Education.com's website and Science Fair Project Ideas is covered by Education.com's Privacy Policy and site Terms of Use, which include limitations on Education.com's liability.
Warning is hereby given that not all Project Ideas are appropriate for all individuals or in all circumstances. Implementation of any Science Project Idea should be undertaken only in appropriate settings and with appropriate parental or other supervision. Reading and following the safety precautions of all materials used in a project is the sole responsibility of each individual. For further information, consult your state's handbook of Science Safety.


